
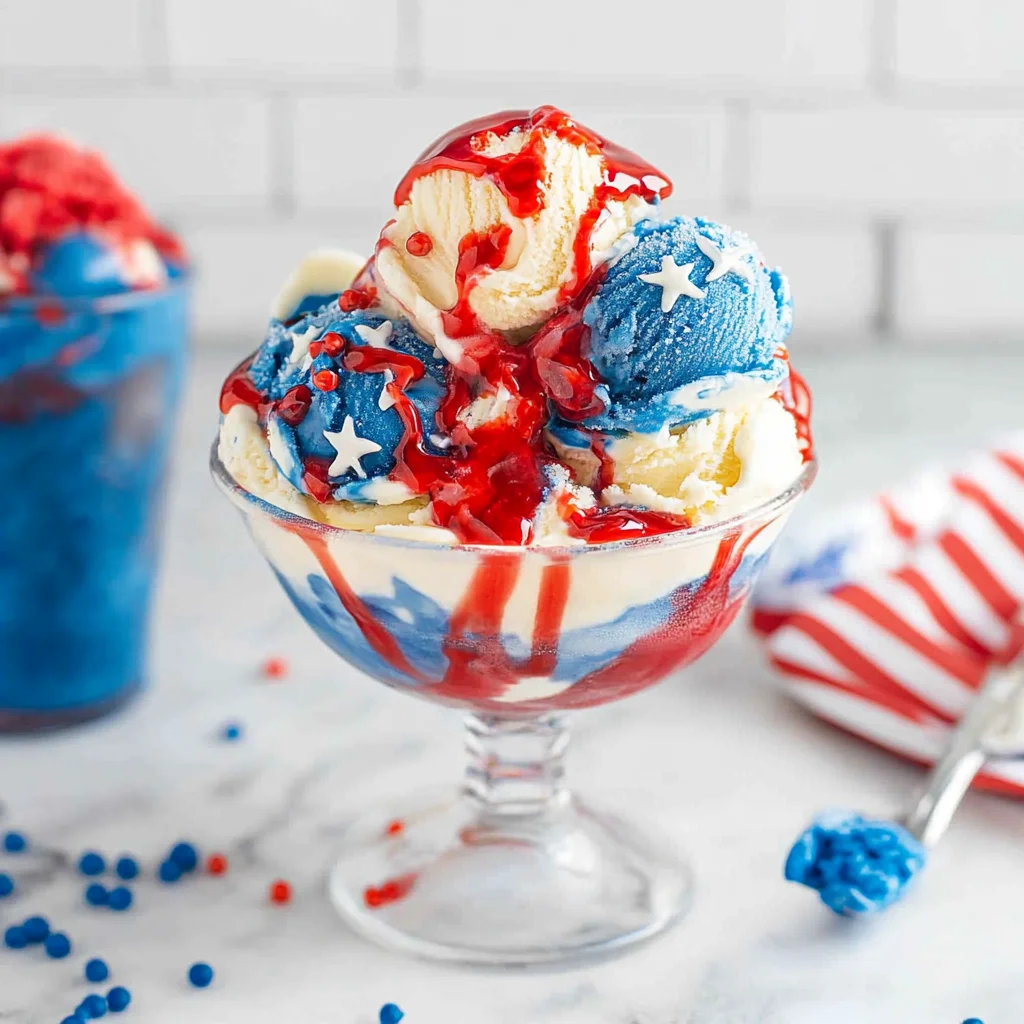
Celebrate in patriotic style with this easy No-Churn Red, White & Blue Ice Cream! This delightful dessert features layers of red, white, and blue creamy vanilla. It’s the perfect treat for summer holidays, family gatherings, or any festive occasion. Best of all, you don’t need an ice cream maker to whip up this deliciously simple recipe.
Why You’ll Love This Recipe
- No Ice Cream Maker Needed: This recipe is incredibly easy as it requires no special equipment. Just mix and freeze!
- Perfect for Celebrations: The vibrant colors make it ideal for Independence Day, Memorial Day, or any patriotic celebration.
- Customizable Flavors: You can mix in your favorite flavors or toppings to personalize your ice cream.
- Family-Friendly Fun: It’s a great activity to do with kids—let them help with layering the colors!
- Quick to Prepare: With only 15 minutes of prep time, you can have a tasty dessert ready in no time.
Tools and Preparation
Before you start making your No-Churn Red, White & Blue Ice Cream, gather your tools. Having everything ready will make the process smoother and more enjoyable.
Essential Tools and Equipment
- Electric mixer
- Large mixing bowl
- Stand mixer (optional)
- Three separate bowls
- Loaf pan (or similar container)
- Spatula
Importance of Each Tool
- Electric mixer: Perfect for whipping heavy cream to stiff peaks effortlessly.
- Loaf pan: Ideal for layering the colorful ice cream mixtures neatly.
- Spatula: Great for gently folding ingredients without deflating the whipped cream.
Ingredients
For the Base
- 2 cups heavy cream (very cold)
- 1 (14-ounce) can sweetened condensed milk
- 1 teaspoon vanilla extract
For Coloring
- Red gel food coloring
- Blue gel food coloring
For Serving (Optional)
- Ice cream cones
How to Make No-Churn Red, White & Blue Ice Cream
Step 1: Beat the Cream
In a large mixing bowl, beat the chilled heavy cream using an electric mixer until stiff peaks form. This step is crucial for a light and fluffy texture.
Step 2: Combine Ingredients
Gently fold in the sweetened condensed milk and vanilla extract into the whipped cream until just combined. Be careful not to overmix; you want to keep that airy texture.
Step 3: Color the Mixtures
Divide the mixture evenly into three separate bowls.
1. Tint one bowl with red gel food coloring.
2. Tint another with blue gel food coloring.
3. Leave the third bowl plain white.
Step 4: Layer in Pan
Remove a chilled loaf pan from the freezer. Spoon the red, white, and blue mixtures into the pan in alternating layers. Use a spatula to smooth out each layer before adding the next.
Step 5: Freeze
Return the pan to the freezer and freeze for 6 to 8 hours, or until fully set.
Step 6: Serve
Scoop into bowls or cones to serve. Add patriotic sprinkles on top if desired for an extra festive touch!
How to Serve No-Churn Red, White & Blue Ice Cream
No-Churn Red, White & Blue Ice Cream is a delightful treat for any summer gathering. Here are some fun and festive serving suggestions to elevate your dessert experience.
On Ice Cream Cones
- Serve the ice cream in crunchy cones for a classic touch. Add a drizzle of chocolate syrup for extra flavor.
In Bowls with Toppings
- Scoop the ice cream into colorful bowls and let guests add their favorite toppings like whipped cream, fresh berries, or sprinkles.
As Sundaes
- Layer the ice cream with hot fudge or caramel sauce. Top with nuts and cherries for a delicious sundae twist.
In Milkshakes
- Blend scoops of this creamy treat with milk for a delicious milkshake. Serve it tall with whipped cream on top.
With Fresh Fruit
- Pair the ice cream with sliced strawberries or blueberries. This adds freshness and complements the patriotic colors beautifully.
As Party Favors
- Scoop portions into small cups with lids as fun party favors. Tie them with ribbons in red, white, and blue for an added festive touch.
How to Perfect No-Churn Red, White & Blue Ice Cream
For the best results when making No-Churn Red, White & Blue Ice Cream, keep these tips in mind:
- Use very cold cream: Starting with chilled heavy cream ensures that you achieve stiff peaks more easily.
- Fold gently: When mixing in the sweetened condensed milk and vanilla extract, fold carefully to maintain the airiness of the whipped cream.
- Adjust colors: Add food coloring gradually until you reach your desired shades of red and blue.
- Layer smartly: Alternate layers evenly in your loaf pan to create visually appealing stripes of color.
- Freeze thoroughly: Ensure that you freeze the ice cream for at least 6 hours so it sets properly before serving.
- Serve immediately after scooping: For best texture, serve the ice cream right after scooping from the freezer.
Best Side Dishes for No-Churn Red, White & Blue Ice Cream
No-Churn Red, White & Blue Ice Cream pairs wonderfully with various side dishes. Here are some great options to consider:
- Grilled Peaches: Sweet grilled peaches bring a warm contrast to your cool ice cream.
- Berry Salad: A fresh mix of strawberries, blueberries, and raspberries enhances the patriotic theme.
- Patriotic Fruit Skewers: Alternate pieces of strawberries and blueberries on skewers for a fun finger food option.
- Homemade Brownies: Rich brownies provide a rich contrast to the lightness of the ice cream.
- Apple Pie Slices: A classic American dessert that complements ice cream perfectly.
- Chocolate Chip Cookies: Soft cookies can be enjoyed alongside scoops of this creamy treat for a delightful combo.
- Pineapple Salsa: Refreshing pineapple salsa adds a tropical twist that pairs well with sweet flavors.
- Coconut Macaroons: Chewy macaroons offer another textural delight that contrasts nicely with smooth ice cream.
Common Mistakes to Avoid
Making No-Churn Red, White & Blue Ice Cream can be simple, but a few common mistakes can affect your results. Here are some tips to ensure your ice cream turns out perfectly.
- Using warm ingredients: Always ensure your heavy cream is very cold before you start whipping it. Warm cream won’t whip properly, leading to a less fluffy texture.
- Overmixing the batter: When folding in the sweetened condensed milk and vanilla extract, mix gently. Overmixing can deflate the whipped cream, resulting in a denser ice cream.
- Not layering evenly: When adding the red, white, and blue mixtures into the loaf pan, take your time to layer them evenly. Uneven layers can lead to a mixed color effect rather than distinct layers.
- Skipping the freeze time: Be sure to freeze the ice cream for at least 6 to 8 hours. This step is crucial for achieving the right consistency and firmness.
- Serving too soon: Resist the temptation to scoop the ice cream immediately after freezing. Letting it sit for a few minutes will make serving easier and more enjoyable.
Storage & Reheating Instructions
Refrigerator Storage
- Store any leftover No-Churn Red, White & Blue Ice Cream in an airtight container.
- It will last up to 3 days in the refrigerator but is best enjoyed fresh.
Freezing No-Churn Red, White & Blue Ice Cream
- Place the ice cream in a freezer-safe container with a tight lid.
- This ice cream can be stored for up to 2 months in the freezer without losing quality.
Reheating No-Churn Red, White & Blue Ice Cream
- Oven: Not recommended for ice cream as heat will melt it.
- Microwave: Use short bursts of 10 seconds on low power if you need to soften it slightly.
- Stovetop: Not recommended; gentle heating methods are not suitable for frozen desserts.
Frequently Asked Questions
Can I use other colors instead of red and blue?
Yes! Feel free to customize with different gel food colors according to your theme or preference while making your No-Churn Red, White & Blue Ice Cream.
How long does it take for No-Churn Red, White & Blue Ice Cream to freeze?
It typically takes about 6-8 hours for the ice cream to fully set in the freezer. Plan ahead so you can enjoy it at its best!
What toppings go well with this ice cream?
Patriotic sprinkles and fresh berries like strawberries or blueberries make excellent toppings for your No-Churn Red, White & Blue Ice Cream!
Can I add mix-ins like chocolate chips or nuts?
Absolutely! Experiment by folding in chocolate chips or chopped nuts before layering them into your pan for added texture and flavor.
Final Thoughts
This No-Churn Red, White & Blue Ice Cream is not only easy to make but also visually stunning and delicious. It’s perfect for summer celebrations or any festive occasion. Feel free to customize with different flavors or toppings to make it uniquely yours—your guests will love this refreshing treat! Give it a try today!
No-Churn Red, White & Blue Ice Cream
No-Churn Red, White & Blue Ice Cream is the ultimate festive dessert for summer celebrations! This vibrant, creamy treat requires no ice cream maker and is incredibly easy to whip up. Just mix, layer, and freeze for an eye-catching dessert that’s perfect for Independence Day, Memorial Day, or any patriotic occasion. With its layers of luscious red, white, and blue, this ice cream is sure to impress family and friends alike. Customize it with your favorite flavors or toppings for a personal touch. In just 15 minutes of prep time, you can create a deliciously simple dessert that adds a splash of color to any gathering!
- Total Time: 0 hours
- Yield: About 6 servings 1x
Ingredients
- 2 cups heavy cream (very cold)
- 1 (14-ounce) can sweetened condensed milk
- 1 teaspoon vanilla extract
- Red gel food coloring
- Blue gel food coloring
Instructions
- In a large mixing bowl, beat the chilled heavy cream until stiff peaks form.
- Gently fold in the sweetened condensed milk and vanilla extract until just combined.
- Divide the mixture into three bowls; tint one red, one blue, and leave one white.
- Layer the colored mixtures in a loaf pan.
- Freeze for 6 to 8 hours until set.
- Serve in bowls or cones with optional toppings.
- Prep Time: 15 minutes
- Cook Time: 6-8 hours (freezing)
- Category: Dessert
- Method: Freezing
- Cuisine: American
Nutrition
- Serving Size: 1 serving
- Calories: 265
- Sugar: 20g
- Sodium: 90mg
- Fat: 21g
- Saturated Fat: 13g
- Unsaturated Fat: 7g
- Trans Fat: 0g
- Carbohydrates: 23g
- Fiber: 0g
- Protein: 3g
- Cholesterol: 75mg