
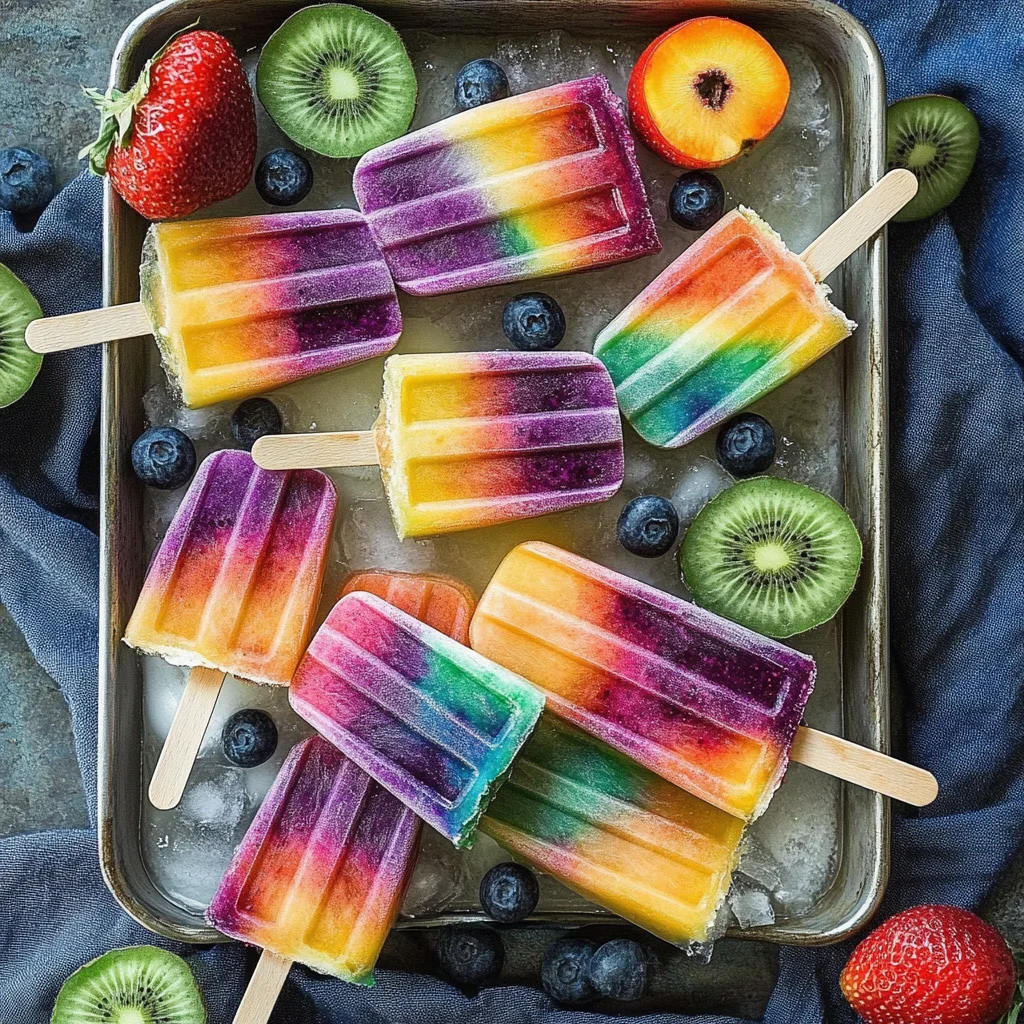
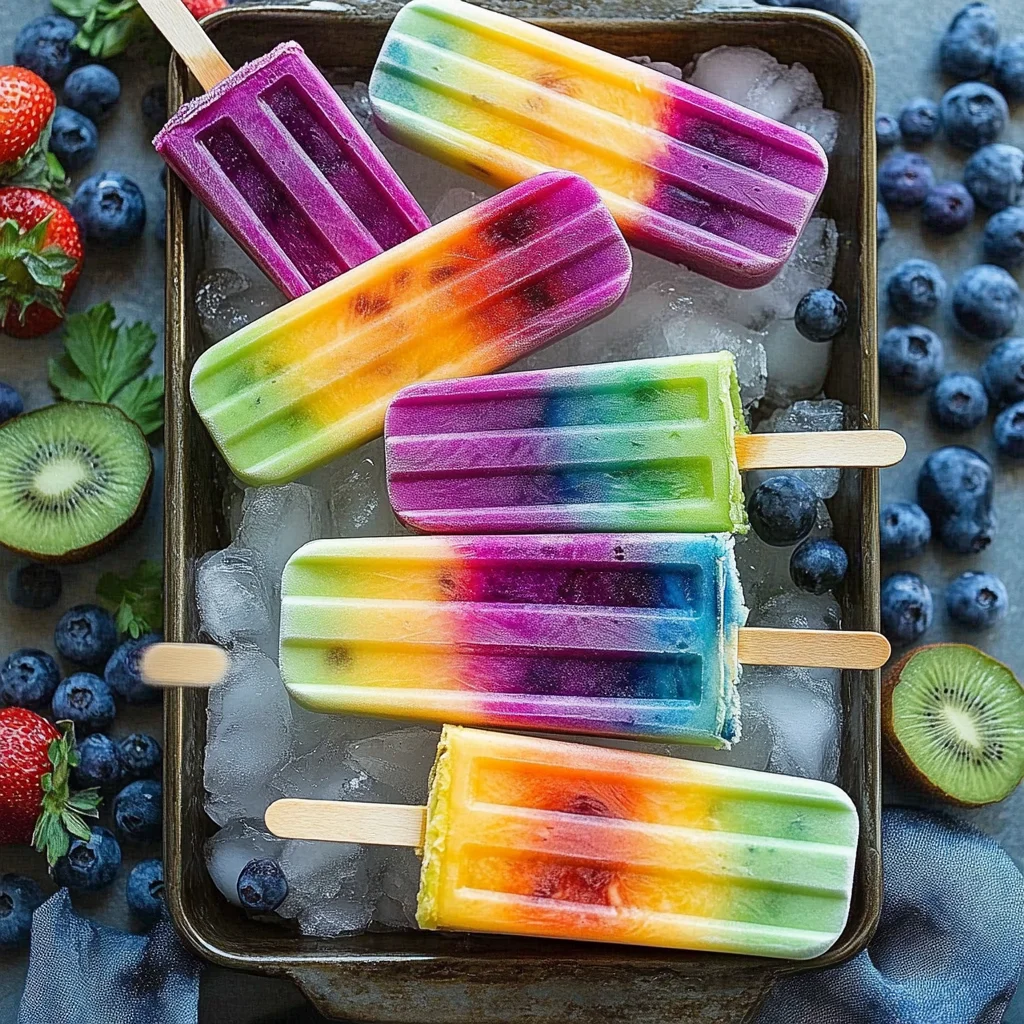
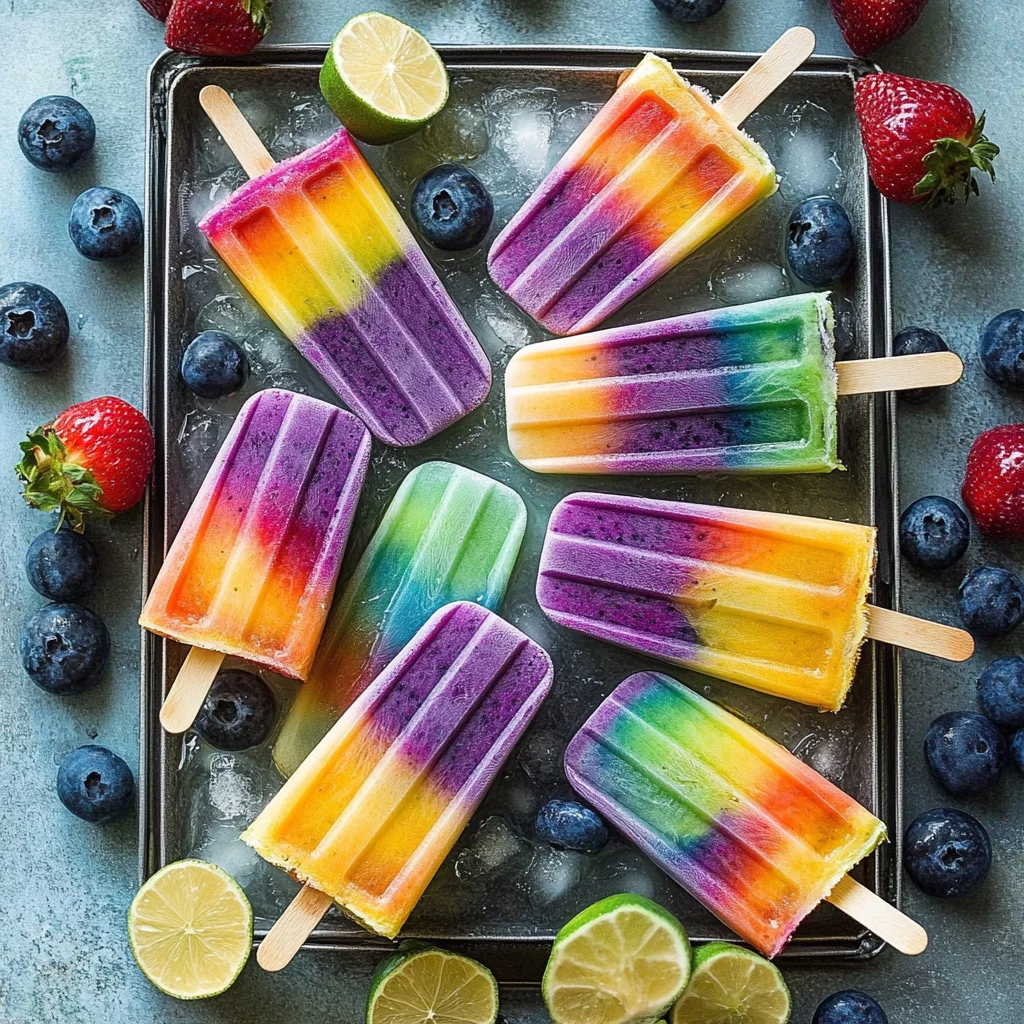
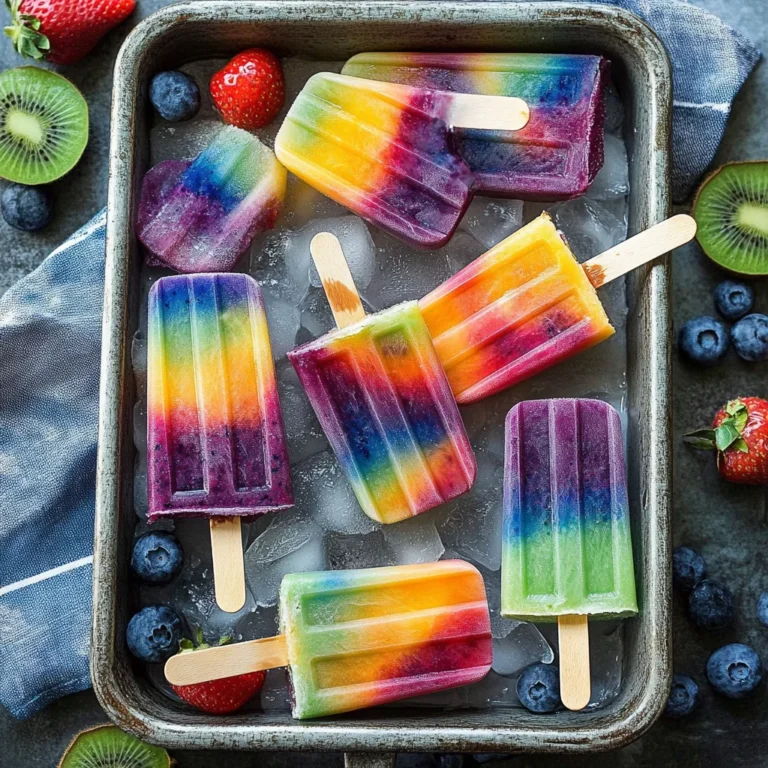
Rainbow popsicles are a delightful treat that brings a splash of color and flavor to any occasion. These Rainbow Popsicles are not only visually stunning but also packed with fresh fruit goodness. Perfect for summer parties, family gatherings, or just a fun snack at home, these popsicles will impress kids and adults alike. Their vibrant layers and fruity flavors make them a standout dessert that’s as enjoyable to make as it is to eat!
Why You’ll Love This Recipe
- Colorful Appeal: The striking layers of fruit in each popsicle create a visual feast that kids can’t resist.
- Healthier Option: Made with fresh fruits and Greek yogurt, these popsicles are a nutritious alternative to store-bought versions.
- Easy to Make: With simple ingredients and straightforward steps, you can whip up these treats in no time.
- Customizable Flavors: Feel free to mix and match fruits based on your preferences or seasonal availability for unique variations.
- Perfect for Hot Days: These refreshing popsicles are ideal for cooling down during hot summer afternoons.
Tools and Preparation
Creating your own rainbow popsicles requires just a few essential tools. Having the right equipment makes the process smoother and more enjoyable.
Essential Tools and Equipment
- Blender
- Popsicle molds
- Measuring cups
- Spatula
Importance of Each Tool
- Blender: A powerful blender ensures smooth blending of fruits and yogurt, creating the perfect texture for your popsicles.
- Popsicle molds: These molds shape your popsicles into fun forms, allowing for easy freezing and removal.
- Measuring cups: Accurate measurements guarantee the right balance of flavors in each layer of your rainbow popsicles.
Ingredients
Outstanding 7 layer rainbow popsicles! Make your own homemade rainbow popsicles with lots of fresh fruit!
Layer 1: Raspberry Layer
- 1 frozen banana
- 1/2 cup (113g) greek yogurt (vanilla or plain)
- 1/2 cup frozen raspberries
- water or liquid for blending
Layer 2: Strawberry Peach Layer
- 1 frozen banana
- 1/2 cup (113g) greek yogurt (vanilla or plain)
- 1/2 cup frozen peaches
- 1 small orange
- 1/4 cup frozen mango
- water or liquid for blending
Layer 3: Pineapple Spinach Layer
- 2 frozen bananas
- 1/2 cup (113g) greek yogurt (vanilla or plain)
- 1 cup frozen pineapple
- water or liquid for blending
Layer 4: Blue Pineapple Layer
- 2 frozen bananas
- 1/2 cup (113g) greek yogurt (vanilla or plain)
- 1 cup frozen pineapple
- small amount of blue food coloring
- water or liquid for blending
Layer 5: Mixed Berry Layer
- 1 frozen banana
- 1/2 cup (113g) greek yogurt (vanilla or plain)
- 1 cup frozen mixed berries
- water or liquid for blending
Layer 6: Beet Strawberry Layer
- 1 frozen banana
- 1/2 cup (113g) greek yogurt (vanilla or plain)
- 1/2 cup sliced canned beets
- 1 cup frozen strawberries or raspberries
How to Make Rainbow Popsicles
Step 1: Prepare the Raspberry Layer
Blend together the ingredients for the raspberry layer until smooth. Pour this mixture into the bottom of your popsicle molds.
Step 2: Freeze the First Layer
Place the molds in the freezer for about 30 minutes until slightly firm.
Step 3: Create the Strawberry Peach Layer
While waiting, blend the ingredients for the strawberry peach layer. Once the first layer has set, pour this second layer over it carefully.
Step 4: Repeat Freezing Process
Freeze again for another 30 minutes until firm.
Step 5: Blend Pineapple Spinach Layer
Prepare your pineapple spinach layer by blending all its ingredients together. Pour this over the second layer after it has set.
Step 6: Continue Adding Layers
Repeat this process with all remaining layers, ensuring each one is allowed to freeze before adding the next.
Step 7: Final Freezing
Once all layers have been added, freeze the popsicles overnight for best results.
Step 8: Enjoy Your Popsicles
To remove from molds, run warm water over them briefly. Enjoy your colorful Rainbow Popsicles!
How to Serve Rainbow Popsicles
Rainbow popsicles are a delightful treat that can be enjoyed in various ways. Whether you’re hosting a summer party or looking for a fun snack, these colorful popsicles can be served creatively to enhance the experience.
Fun Party Platter
- Colorful Display: Arrange the rainbow popsicles on a large platter with fresh fruits and mint leaves for a vibrant presentation.
- Popsicle Sticks: Use decorative sticks or even mini umbrellas to make each popsicle visually appealing.
Kid-Friendly Treats
- DIY Popsicle Station: Set up a station where kids can choose their favorite colors and flavors while making their own popsicles.
- Popsicle Sandwiches: Place two rainbow popsicles between graham crackers for a fun and portable dessert.
Refreshing Dessert Option
- Serve with Yogurt Dip: Pair the popsicles with a side of yogurt dip for added creaminess and flavor.
- Top with Fresh Fruit: Garnish each popsicle with small pieces of fruit to elevate the taste and presentation.
How to Perfect Rainbow Popsicles
Creating the perfect rainbow popsicles requires attention to detail. Here are some tips to ensure your homemade treats come out beautifully.
- bold Use Frozen Fruit: Using frozen fruit helps achieve creamy textures and vibrant colors without needing ice.
- bold Layer Wisely: Pour each layer slowly to avoid mixing, allowing you to create distinct color bands.
- bold Experiment with Flavors: Don’t hesitate to mix different fruits and flavors; this can lead to unique combinations that everyone will love.
- bold Blend Smoothly: Ensure that each layer is blended smoothly so there are no chunks, making it easier to pour into molds.
- bold Chill Properly: Allow each layer enough time to set in the freezer before adding the next for perfect layers.
Best Side Dishes for Rainbow Popsicles
Rainbow popsicles can be complemented with delicious side dishes that make your treat even more enjoyable. Here are some great options:
- bold Fresh Fruit Salad: A mix of seasonal fruits adds freshness and balances the sweetness of the popsicles.
- bold Yogurt Parfaits: Layer yogurt, granola, and berries for a nutritious side that pairs well with fruity flavors.
- bold Veggie Sticks with Hummus: Crunchy vegetables served alongside hummus provide a savory contrast to sweet popsicles.
- bold Cheese Platter: Include a selection of cheeses for those who enjoy savory snacks; it offers variety alongside fruity treats.
- bold Mini Sandwiches: Small finger sandwiches filled with fresh ingredients can serve as a good accompaniment.
- bold Trail Mix: A homemade trail mix of nuts, seeds, and dried fruit makes for a healthy snack option alongside popsicles.
Common Mistakes to Avoid
Making rainbow popsicles can be a fun and rewarding experience. However, a few common mistakes can lead to disappointing results. Here are some tips to ensure your homemade rainbow popsicles turn out perfectly.
- Bold flavor imbalance: Using too much yogurt or fruit in one layer can overpower the taste of other layers. Aim for an even balance of flavors to keep each layer distinct.
- Bold improper freezing time: Not allowing enough freezing time between layers can cause them to mix. Make sure each layer is fully frozen before adding the next one, usually about 30 minutes.
- Bold inadequate blending: Failing to blend ingredients thoroughly can result in chunky layers. Blend until smooth for a creamy texture that freezes well.
- Bold using low-quality fruits: Poor-quality or overly ripe fruits can change the taste and texture of your popsicles. Use fresh or properly frozen fruits for the best results.
- Bold neglecting portion sizes: Filling molds too high can make it difficult to remove popsicles later. Fill your molds only up to the recommended line to avoid spills and messes.
Storage & Reheating Instructions
Refrigerator Storage
- Store leftover rainbow popsicles in an airtight container.
- They will last in the refrigerator for up to 1 week.
- For best quality, consume within a few days.
Freezing Rainbow Popsicles
- Keep popsicles in their original molds or transfer them to a freezer-safe container.
- Properly stored, they can last up to 3 months in the freezer.
- Label containers with the date for easy tracking.
Reheating Rainbow Popsicles
- Bold Oven: Preheat your oven to 350°F (175°C) and place popsicles on a baking sheet. Heat for about 5-10 minutes until slightly softened.
- Bold Microwave: Wrap popsicles in a damp paper towel and microwave on low power for 15-30 seconds at a time until soft enough to eat.
- Bold Stovetop: Place popsicles briefly in warm water (not boiling) until they soften, which takes about 1-2 minutes.
Frequently Asked Questions
What are Rainbow Popsicles?
Rainbow popsicles are colorful frozen treats made with layers of fruit purees and yogurt, creating a visually appealing dessert that is both tasty and healthy.
How do I customize my Rainbow Popsicles?
You can customize rainbow popsicles by changing the fruit combinations or adding extras like honey, vanilla extract, or even spinach for added nutrition without altering the flavor significantly.
Can I use fresh fruit instead of frozen?
Yes, you can use fresh fruit! Just remember to freeze it beforehand for a smoother texture when blending.
How long does it take to make Rainbow Popsicles?
The total time is about 510 minutes, including prep and freezing time. Each individual layer requires about 30 minutes to freeze before adding the next layer.
Final Thoughts
Rainbow popsicles are a delightful way to enjoy fresh fruit while keeping cool during hot summer days. With their vibrant colors and fruity flavors, they offer endless customization options. Try experimenting with different fruits or yogurt flavors to create your perfect treat! Enjoy making these homemade rainbow popsicles today!
Rainbow Popsicles
Rainbow popsicles are a vibrant and refreshing treat that’s perfect for warm summer days. Bursting with colorful layers of fresh fruit and creamy Greek yogurt, these homemade popsicles are not only visually appealing but also nutritious. Ideal for family gatherings, parties, or just a fun afternoon snack, these popsicles provide a delightful way to enjoy healthy ingredients while keeping cool. With simple preparation steps and customizable flavors, you can create a unique frozen dessert that everyone will love.
- Total Time: 4 hours 20 minutes
- Yield: Makes approximately 6 servings
Ingredients
- Frozen bananas
- Greek yogurt (vanilla or plain)
- Frozen raspberries
- Frozen peaches
- Small orange
- Frozen mango
- Frozen pineapple
- Spinach (optional)
- Blue food coloring (optional)
- Frozen mixed berries
- Sliced canned beets
- Frozen strawberries
Instructions
- Prepare each fruit layer by blending the ingredients until smooth.
- Pour the first layer into popsicle molds and freeze for 30 minutes.
- Repeat the blending and freezing process for each subsequent layer.
- After all layers are added, freeze overnight for best results.
- To serve, run warm water over the molds briefly before enjoying.
- Prep Time: 20 minutes
- Cook Time: 240 minutes (freezing time)
- Category: Dessert
- Method: Freezing
- Cuisine: American
Nutrition
- Serving Size: 1 serving
- Calories: 60
- Sugar: 8g
- Sodium: 20mg
- Fat: 1g
- Saturated Fat: 0g
- Unsaturated Fat: 0g
- Trans Fat: 0g
- Carbohydrates: 14g
- Fiber: 2g
- Protein: 2g
- Cholesterol: 0mg