
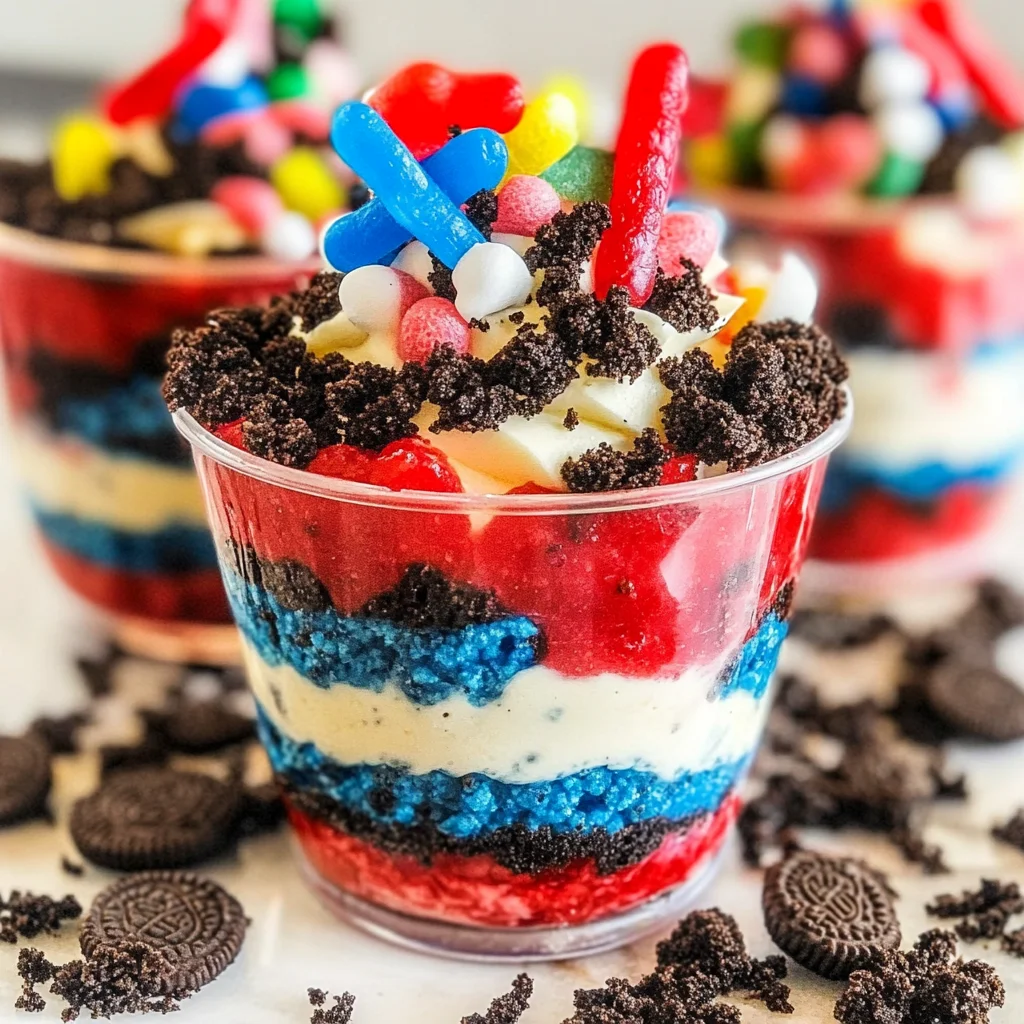
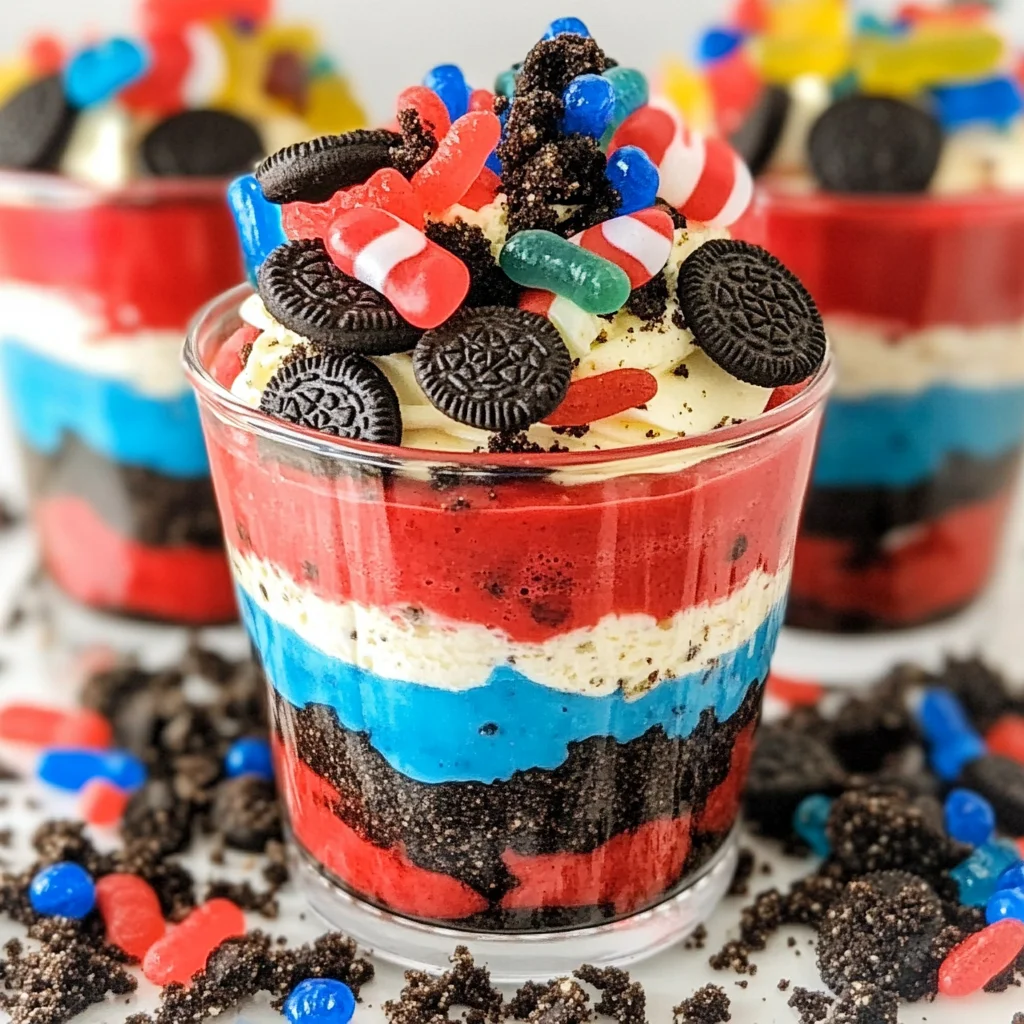
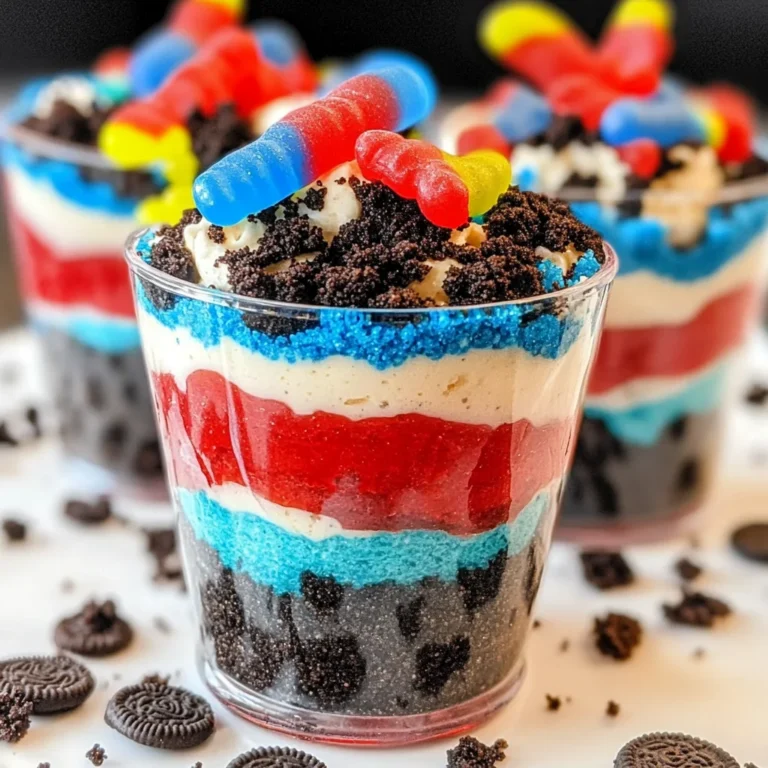
Easy No-Bake Red, White and Blue Dirt Cups make the perfect summer dessert that kids will love, featuring layers of Oreos, creamy pudding, and vibrant pectin-based gummy candies! These delightful treats are ideal for celebrations such as the 4th of July, picnics, or family gatherings. With their fun colors and delicious taste, these dirt cups are sure to be a hit at any occasion.
Why You’ll Love This Recipe
- Simple and Quick: This no-bake recipe takes just 10 minutes to prepare, making it perfect for busy summer days.
- Kid-Friendly: The fun layers and colorful gummy candies make these cups a favorite among children.
- Customizable: You can easily swap out colors or flavors to fit different themes or occasions.
- Perfect for Parties: These cups are not only tasty but also visually appealing, making them a great addition to any dessert table.
- No Special Equipment Needed: All you need is basic kitchen tools to create this delightful dessert.
Tools and Preparation
Before diving into the fun part of making your 4th of July Dirt Cups, gather all necessary tools. Having everything ready will streamline your preparation process.
Essential Tools and Equipment
- Mixing bowls
- Whisk
- Ziploc bag or food processor
- Measuring cups
- Serving cups
Importance of Each Tool
- Mixing bowls: Essential for combining ingredients smoothly without spilling.
- Whisk: Helps achieve a creamy texture in the pudding by thoroughly mixing with minimal effort.
- Ziploc bag or food processor: Makes crushing Oreos quick and mess-free.
Ingredients
Ingredients:
– 2 boxes cheesecake pudding (3.4 ounces each)
– 4 cups milk
– 19 Oreo cookies (crushed)
– ¼ teaspoon red gel food dye
– ¼ teaspoon blue gel food dye
– 8 red and blue pectin-based gummy candies
How to Make 4th of July Dirt Cups
Step 1: Crush the Oreos
To crush the Oreo cookies, put them in a Ziploc bag. Use a rolling pin to crush them into small pieces. Alternatively, you can use a food processor for quicker results.
Step 2: Prepare the Pudding
In a large mixing bowl, pour both boxes of cheesecake pudding mix. Add 4 cups of milk and whisk until smooth. Let it sit for a few minutes to thicken.
Step 3: Divide the Pudding
Separate the pudding into two bowls. Place 1 cup of pudding in one bowl and 1 ½ cups in another bowl.
Step 4: Color the Pudding
Add the blue gel food dye to the bowl with only 1 cup of pudding. Stir well until there are no color streaks remaining. Next, take the bowl with 1 ½ cups pudding and add red gel food dye. Mix until fully blended.
Step 5: Layer the Cups
Line up your serving cups. Start by adding 1 tablespoon of crushed Oreos at the bottom of each cup, spreading it evenly.
Step 6: Add Blue Pudding Layer
Spoon in 2 tablespoons of blue pudding on top of the Oreos. Gently spread it out evenly.
Step 7: Add More Oreos
Sprinkle another tablespoon of crushed Oreos over the blue layer and spread evenly again.
Step 8: White Pudding Layer
Add 3 tablespoons of white pudding next and spread it evenly across this layer.
Step 9: Second White Layer
Follow up with an additional layer using about 1½ tablespoons more white pudding. Spread evenly once more.
Step 10: Red Pudding Layer
Now add four tablespoons of red pudding on top as your next vibrant layer.
Step 11: Final Touches
For your last layer, sprinkle in about two tablespoons of crushed Oreo on top. Finish by placing two pectin-based gummy candies and one decorative flag per cup before serving!
Enjoy your festive treat!
How to Serve 4th of July Dirt Cups
These delightful 4th of July Dirt Cups are not only tasty but also visually appealing, making them a perfect treat for summer gatherings. Here are some fun serving suggestions that will impress your guests.
For Kids’ Parties
- Mini Cups: Use small cups to create individual servings that are easy for little hands to hold and enjoy.
- Decorative Toppers: Add festive decorations like mini flags or sprinkles on top for a fun touch.
At Family Barbecues
- Trifle Dish: Layer the dirt cups in a large trifle dish for a stunning centerpiece that allows everyone to serve themselves.
- Ice Cream Scoops: Serve alongside scoops of vanilla ice cream for an extra creamy texture that complements the layers.
For Picnics
- Mason Jars: Prepare individual dirt cups in mason jars with lids, making them portable and easy to transport.
- Chill Before Serving: Keep them chilled in a cooler until you’re ready to serve, ensuring they stay fresh and tasty.
How to Perfect 4th of July Dirt Cups
Elevate your 4th of July Dirt Cups with these simple tips. They will help you achieve the best flavor and presentation.
- Bold Colors: Use gel food dyes sparingly for vibrant layers, ensuring each color pops against the Oreo base.
- Chill Thoroughly: Let the pudding set in the fridge for at least an hour before serving for optimal texture.
- Layer Carefully: Spread each layer evenly to maintain distinct colors and provide a beautiful presentation.
- Use Fresh Ingredients: Opt for fresh milk and high-quality Oreos to enhance the overall taste of your dessert.
Best Side Dishes for 4th of July Dirt Cups
To complement your delicious 4th of July Dirt Cups, consider these refreshing side dishes that fit perfectly into your summer spread.
- Grilled Vegetable Skewers: Colorful veggies grilled to perfection add a smoky flavor that balances sweetness.
- Classic Coleslaw: A crunchy, tangy slaw offers a refreshing contrast to the rich dirt cups.
- Corn on the Cob: Sweet corn grilled with butter is always a hit during summer gatherings.
- Potato Salad: Creamy potato salad brings comfort and pairs well with sweet desserts.
- Fruit Salad: A mix of seasonal fruits adds brightness and healthiness to your meal.
- Caprese Salad: Fresh tomatoes, mozzarella balls, and basil drizzled with balsamic glaze make for a lovely, light side.
Common Mistakes to Avoid
Making 4th of July Dirt Cups can be easy, but avoiding common mistakes will ensure they turn out perfectly.
- Using warm ingredients: Always ensure your milk is cold when making pudding. Warm milk can prevent the pudding from thickening properly.
- Not crushing Oreos enough: For the best texture, crush Oreos into fine crumbs. Large chunks won’t create the desired layers and could lead to uneven distribution.
- Skipping the chilling time: Allow the pudding to set for a few minutes after mixing. Skipping this step may result in a runny dessert.
- Overmixing food coloring: When adding gel food dye, mix just until combined. Overmixing can cause the pudding to become too thin or lose its vibrant color.
- Ignoring layering technique: Layer the ingredients carefully to achieve that beautiful red, white, and blue effect. Rushing through this step may muddle the colors.
- Not using appropriate containers: Choose clear cups so everyone can admire the colorful layers. Opaque containers hide the festive look of your dirt cups.
Storage & Reheating Instructions
Refrigerator Storage
- Store your 4th of July Dirt Cups in airtight containers in the refrigerator.
- They will stay fresh for up to 3 days.
Freezing 4th of July Dirt Cups
- Freezing is not recommended as it may alter the texture of the pudding and gummy candies.
Reheating 4th of July Dirt Cups
- Oven: Not recommended as it may melt the layers together and spoil the appearance.
- Microwave: Generally not suitable for this recipe; it can heat unevenly and ruin texture.
- Stovetop: Do not reheat; serve chilled for best taste.
Frequently Asked Questions
Here are some frequently asked questions about 4th of July Dirt Cups.
Can I use different flavors of pudding?
Yes! While cheesecake pudding works great, you can experiment with other flavors like vanilla or chocolate for a unique twist.
How long do 4th of July Dirt Cups last?
These delightful treats can last up to 3 days in the refrigerator when stored properly in airtight containers.
Can I make these cups ahead of time?
Absolutely! You can prepare them a day in advance, making them perfect for summer gatherings or parties.
What can I substitute for Oreos?
You can use any chocolate sandwich cookies as a substitute if you want to try something new while keeping that delicious chocolate layer intact.
Are there gluten-free options available?
Yes! Look for gluten-free sandwich cookies and suitable pudding mixes to make gluten-free 4th of July Dirt Cups.
Final Thoughts
These 4th of July Dirt Cups are an easy and fun dessert that everyone will love! With their colorful layers and creamy texture, they are perfect for summer celebrations. Feel free to customize them with different flavors or toppings to suit your taste!
4th of July Dirt Cups
Celebrate summer with these easy 4th of July Dirt Cups! Layers of colorful goodness make them perfect for any gathering. Try them today!
- Total Time: 0 hours
- Yield: Serves approximately 6 cups 1x
Ingredients
- 2 boxes cheesecake pudding (3.4 ounces each)
- 4 cups milk
- 19 Oreo cookies (crushed)
- ¼ teaspoon red gel food dye
- ¼ teaspoon blue gel food dye
- 8 red and blue pectin-based gummy candies
Instructions
- Crush Oreo cookies in a Ziploc bag using a rolling pin or in a food processor until fine.
- In a large mixing bowl, combine cheesecake pudding mix with milk and whisk until smooth. Let it sit for a few minutes to thicken.
- Divide the pudding into two bowls: 1 cup in one bowl (for blue) and 1½ cups in another (for red). Color the puddings using red and blue gel food dyes.
- Layer dessert cups starting with crushed Oreos at the bottom, followed by layers of blue pudding, more Oreos, white pudding, additional white pudding layer, and finally red pudding on top.
- Finish with crushed Oreos and decorate with pectin-based gummy candies.
- Prep Time: 10 minutes
- Cook Time: None
- Category: Dessert
- Method: No-Bake
- Cuisine: American
Nutrition
- Serving Size: 1 cup (approximately 250g)
- Calories: 320
- Sugar: 25g
- Sodium: 230mg
- Fat: 12g
- Saturated Fat: 6g
- Unsaturated Fat: 4g
- Trans Fat: 0g
- Carbohydrates: 47g
- Fiber: 2g
- Protein: 5g
- Cholesterol: 20mg