
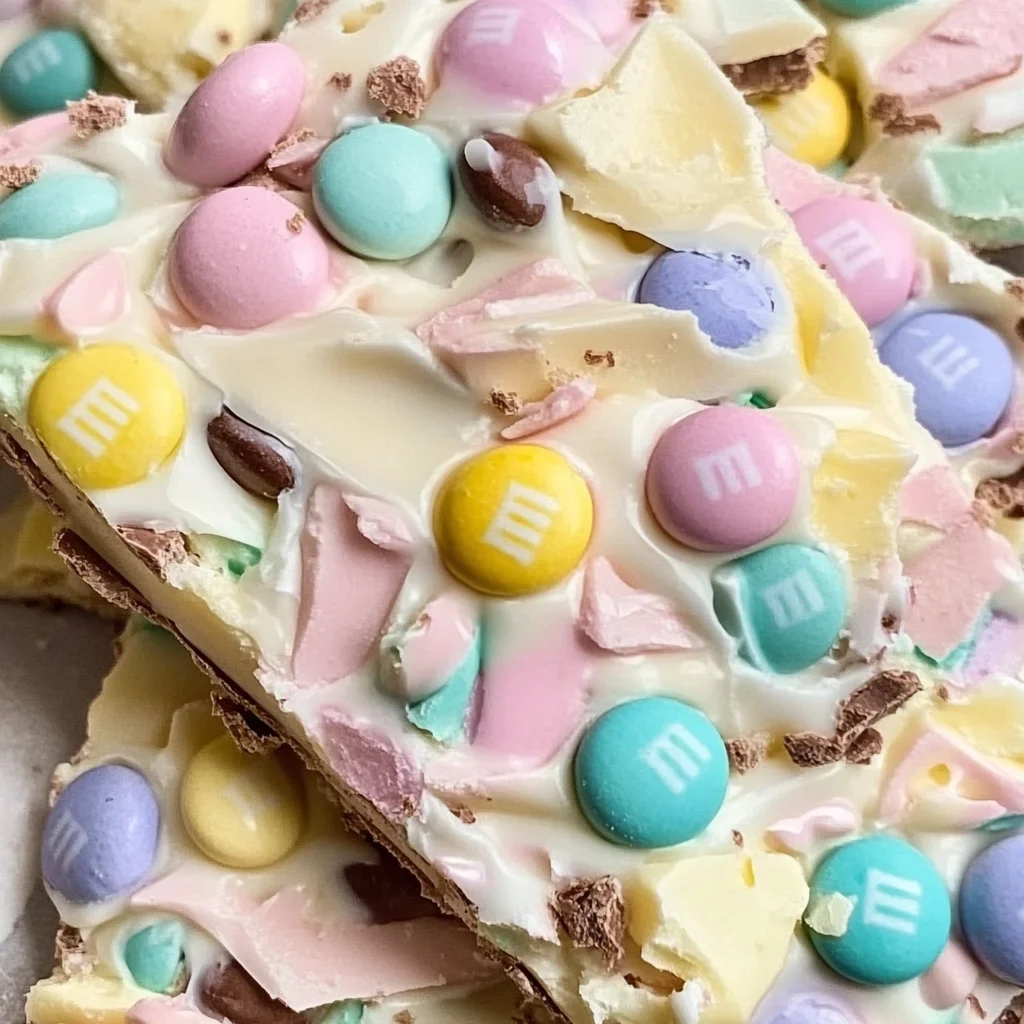
Easter Bunny Bark is a delightful treat that brings joy to any gathering, especially during Easter celebrations. With its vibrant colors and sweet flavor, this candy bark is perfect for sharing with family and friends. In just minutes, you can create a beautiful and tasty dessert that will impress everyone at your holiday festivities!
Why You’ll Love This Recipe
- Quick to Make: With only two main ingredients, you can whip up this festive candy in no time.
- Colorful Presentation: The pastel M&M’s create a fun and appealing look that catches the eye.
- Versatile Treat: Perfect for Easter celebrations, parties, or as a sweet gift for loved ones.
- Customizable Options: Feel free to experiment with different colors of candy or shapes in your silicone pan.
- Easy Cleanup: Using a disposable piping bag simplifies the process and minimizes mess.
Tools and Preparation
To make your Easter Bunny Bark, you’ll need some essential tools that will streamline your preparation process.
Essential Tools and Equipment
- Easter bunny silicone pan
- Disposable piping bag
Importance of Each Tool
- Easter bunny silicone pan: This specialized pan helps create perfectly shaped bunnies, making your candy visually appealing for any occasion.
- Disposable piping bag: This tool allows for easy handling of melted candy melts without needing to transfer them to another container, keeping everything neat.
Ingredients
To create your delicious Easter Bunny Bark, gather the following ingredients:
For the Candy Bark
- Easter bunny silicone pan
- Disposable piping bag
- 120 pastel colored M&M’s (24 each pink, blue, green, yellow, and purple)
- 2 cups bright white candy melting wafers
How to Make Easter Bunny Bark
Step 1: Melt the Candy Wafers
- Add 1 cup of bright white candy melting wafers to the disposable piping bag.
- Microwave in 1-minute intervals at 50% power until completely melted. (See Tip 1)
Step 2: Prepare the Silicone Pan
- Add one of each color pastel M&M’s into each cavity of the bunny silicone pan.
- Don’t worry about how they lay; some may be flat while others might be on their sides.
Step 3: Fill the Cavities
- Snip off the tip of the piping bag after the melts are melted.
- Pipe the bright white candy melts into each cavity, just barely covering the M&M’s.
- Tap the pan gently to help evenly distribute the candy coating.
Step 4: Harden and Remove
- Allow the bark to harden completely in the silicone pan.
- Once hardened, carefully remove from the pan.
Step 5: Repeat Process
- Repeat steps with additional melted bright white candy melts and M&M’s until all candies are made.
- Yield: Approximately 24 Easter Bunny Bark pieces. (See Tip 2)
Enjoy making these delightful treats for your next celebration!
How to Serve Easter Bunny Bark
Easter Bunny Bark is a delightful treat that can be enjoyed in various ways. Whether you are hosting an Easter gathering or simply sharing with family, these serving suggestions will enhance your celebration.
Individual Treat Bags
- Use small, clear bags to package individual pieces of Easter Bunny Bark. Tie them with colorful ribbons for a festive touch.
Dessert Platter
- Arrange the Easter Bunny Bark on a decorative platter alongside other sweets like cookies and chocolates. This creates an eye-catching dessert table.
Ice Cream Topping
- Crumble Easter Bunny Bark over ice cream for a fun and crunchy topping. It adds vibrant color and texture to your favorite flavors.
Party Favors
- Include Easter Bunny Bark in gift baskets as party favors. Pair it with other homemade treats for a sweet surprise for your guests.
Creative Dessert Bar
- Set up a dessert bar where guests can create their own treats using Easter Bunny Bark as a base. Provide toppings like sprinkles, nuts, and fruit for customization.
How to Perfect Easter Bunny Bark
Making perfect Easter Bunny Bark is easy with these helpful tips. Follow these suggestions to ensure your candy turns out beautifully every time.
- Use quality melting wafers: Choose high-quality candy melting wafers for a smooth and shiny finish.
- Microwave in intervals: Melt the candy wafers in small intervals to prevent scorching. Stir between each interval for even melting.
- Tap gently: After piping the melted candy into the molds, tap the pan gently on the counter to eliminate air bubbles and ensure even distribution.
- Let it cool completely: Allow the bark to harden at room temperature before removing it from the molds for clean edges.
- Experiment with colors: Try using different colored melting wafers to match your holiday theme or create unique designs.
Best Side Dishes for Easter Bunny Bark
Pairing side dishes with Easter Bunny Bark can create a well-rounded dessert experience. Here are some delicious options to consider:
- Fruit Salad: A refreshing mix of seasonal fruits that complements the sweetness of the bark.
- Mini Cupcakes: Small cupcakes topped with pastel frosting provide a delightful contrast in flavors and textures.
- Chocolate-Covered Strawberries: Juicy strawberries dipped in chocolate add elegance and flavor to your dessert spread.
- Spring Vegetable Platter: Crisp veggies served with dip offer a savory balance to the sweet treats.
- Cheese Board: A selection of cheeses paired with crackers provides a savory note that pairs nicely with sweets.
- Brownie Bites: Rich brownie bites add another layer of indulgence that guests will love.
- Marshmallow Treats: Chewy marshmallow squares are easy to make and are always a crowd-pleaser during festive occasions.
- Cookies: A variety of cookies like sugar or oatmeal raisin give extra options for guests to enjoy alongside their bark.
Common Mistakes to Avoid
Making Easter Bunny Bark is simple, but there are a few common pitfalls to watch out for.
- Boldly filling the cavities: Overfilling the bunny silicone pan can lead to a messy result. Ensure you pipe just enough candy melts to cover the M&M’s without overflowing.
- Ignoring melting instructions: Melting candy wafers at too high a power can cause them to seize. Always microwave at 50% power and in short intervals for best results.
- Rushing the hardening process: Removing the bark from the pan too early can ruin its shape. Allow it to cool completely before taking it out.
- Using stale ingredients: Old candy or wafers can affect the taste and texture of your Easter Bunny Bark. Always use fresh ingredients for optimal flavor.
- Not tapping the pan: Failing to tap the silicone pan can leave air bubbles in your bark. Gently tap the pan after filling it to ensure an even distribution.
Storage & Reheating Instructions
Refrigerator Storage
- Store Easter Bunny Bark in an airtight container.
- It will last up to 2 weeks in the refrigerator.
Freezing Easter Bunny Bark
- Wrap individual pieces in plastic wrap for best results.
- Freeze for up to 3 months; allow thawing in the fridge before serving.
Reheating Easter Bunny Bark
- Oven: Preheat your oven to low heat, place bark on a baking sheet, and warm briefly until soft.
- Microwave: Heat on a low setting for short bursts (5-10 seconds) until softened. Be careful not to melt completely.
- Stovetop: Use a double boiler method, keeping water simmering beneath a bowl with bark, stirring gently until warmed.
Frequently Asked Questions
Here are some common questions about making Easter Bunny Bark.
What is Easter Bunny Bark?
Easter Bunny Bark is a fun, festive treat made with candy melts and pastel M&M’s shaped like bunnies. It’s perfect for celebrating!
Can I customize my Easter Bunny Bark?
Absolutely! You can add nuts, sprinkles, or different types of candy to personalize your bark according to your preferences.
How long does it take to make Easter Bunny Bark?
The total time is about 20 minutes, including prep and cooling time, making it a quick and easy treat!
What are some ideas for using leftover candy melts?
You can use leftover candy melts for dipping fruits or pretzels, creating themed treats like cookies or additional chocolate barks.
Final Thoughts
Easter Bunny Bark is an adorable and delicious treat that’s perfect for any spring celebration. With its easy preparation and delightful customization options, you can create something special that everyone will love. Try adding your favorite candies or colors for a unique twist!
Easter Bunny Bark
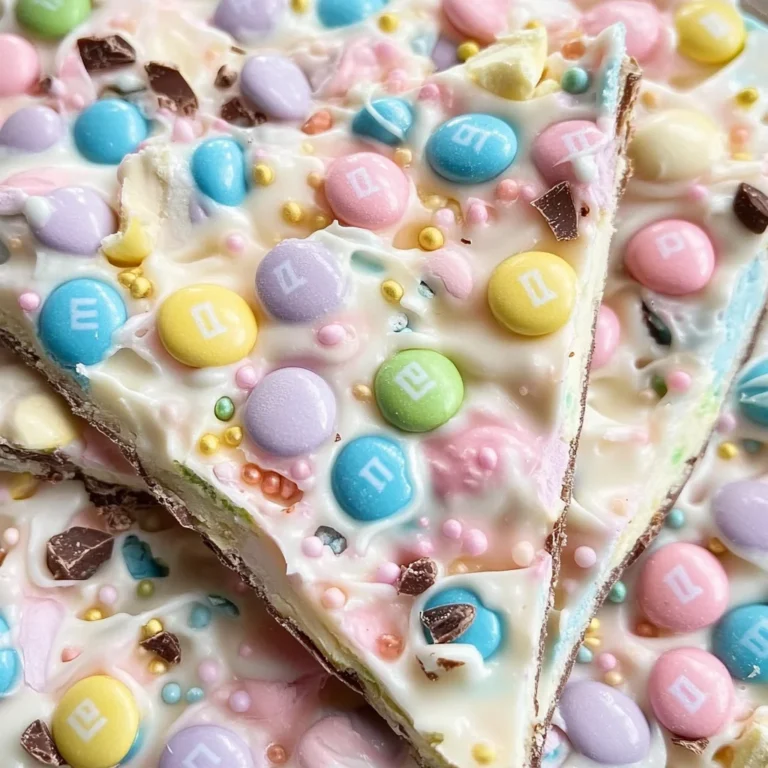
Easter Bunny Bark is a delightful and colorful treat that’s perfect for spring celebrations. This fun candy bark captures the joy of Easter with its eye-catching pastel colors and sweet flavors. Made with just two main ingredients, you can whip up this festive dessert in no time, making it an ideal choice for gatherings, parties, or as a personalized gift. Whether arranged on a dessert platter or packaged in individual bags, this customizable treat will surely impress family and friends alike. With endless possibilities for variations, including different colors of candy and creative shapes, Easter Bunny Bark is not only easy to make but also a joy to share!
- Total Time: 20 minutes
- Yield: Approximately 24 servings 1x
Ingredients
- 120 pastel colored M&M's (24 each pink, blue, green, yellow, and purple)
- 2 cups bright white candy melting wafers
- Easter bunny silicone pan
- Disposable piping bag
Instructions
- Melt 1 cup of bright white candy melting wafers in a disposable piping bag using the microwave at 50% power in 1-minute intervals until completely melted.
- Place one of each color of pastel M&M into each cavity of the bunny silicone pan.
- Snip off the tip of the piping bag once the melts are melted and pipe into each cavity to cover the M&M's.
- Gently tap the pan to evenly distribute the candy coating.
- Allow the bark to harden completely before carefully removing it from the pan.
- Repeat the process until all candies are made.
- Prep Time: 10 minutes
- Cook Time: 10 minutes
- Category: Dessert
- Method: Baking
- Cuisine: American
Nutrition
- Serving Size: 1 piece (30g)
- Calories: 140
- Sugar: 12g
- Sodium: 30mg
- Fat: 7g
- Saturated Fat: 4g
- Unsaturated Fat: 3g
- Trans Fat: 0g
- Carbohydrates: 18g
- Fiber: 0g
- Protein: 1g
- Cholesterol: 0mg